Saturday, April 21, 2012

Shoes to Dye For

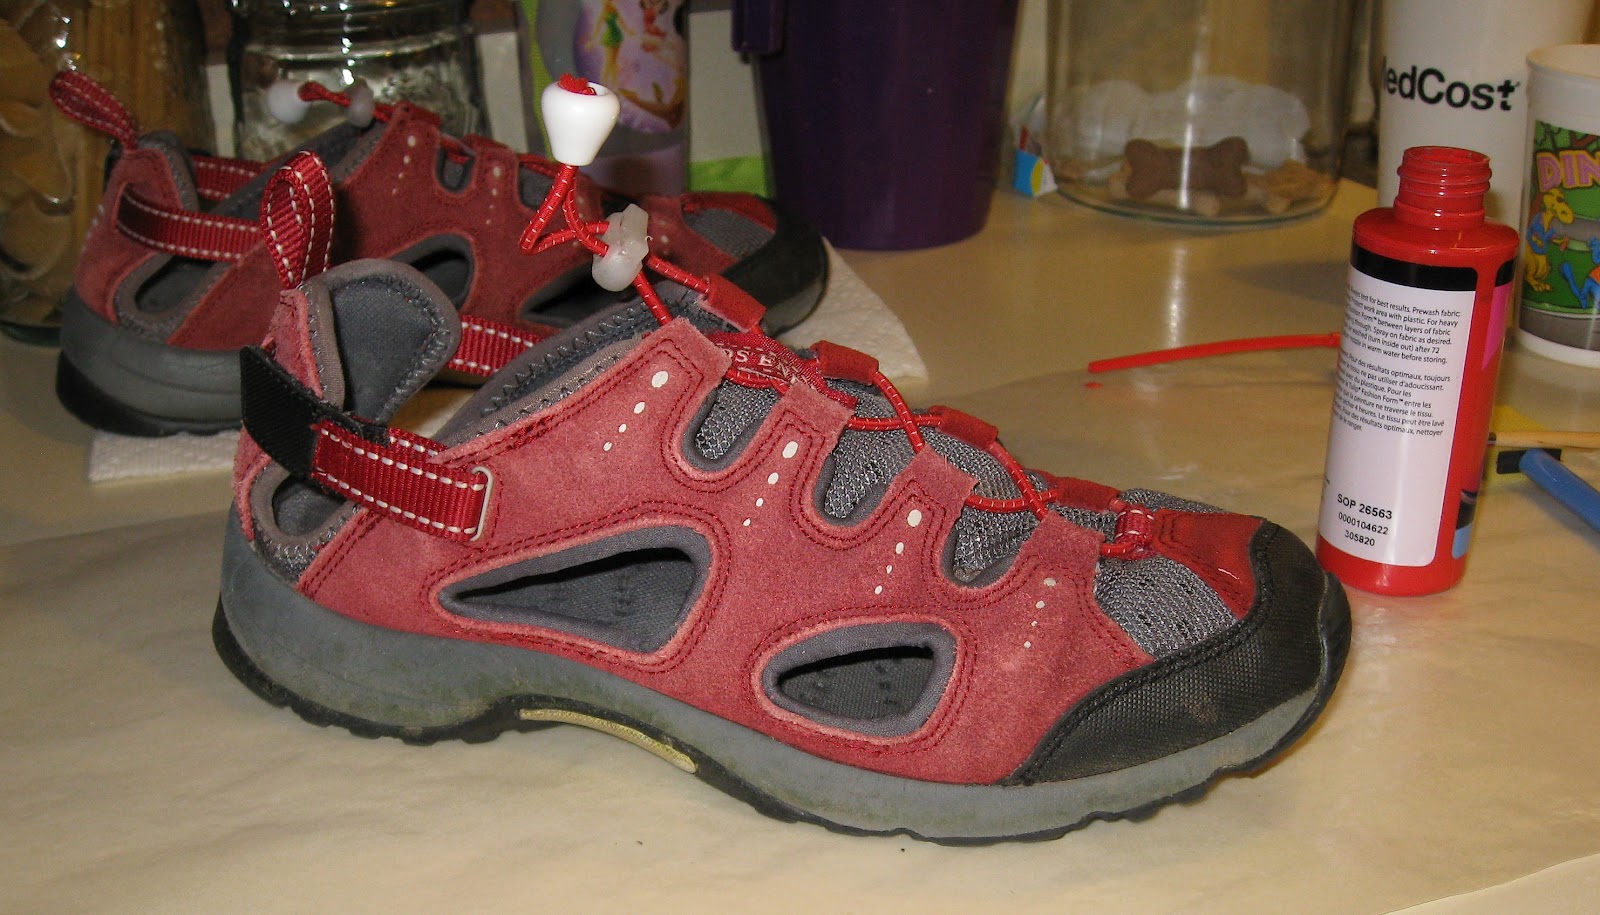
My favorite pair of shoes aren't looking so good these days. I've had them for years! They started to fade long ago, I've replaced the laces, and the insoles aren't so great anymore, but there's still plenty of tread on the bottoms and I just know these old shoes still have some life in them! I've had them so long I should probably just replace them, but I'm not quite ready to part ways with them. So I decided to give them a MAKEOVER!
Side of shoe prior to treatment.
I saw some fabric spray paint in a craft store a while back that I thought might be perfect for this project! Since the paint was thin enough to spray, I knew it'd be easy to apply with a paint brush.
Here's I shot I took in the midst of painting. The left side of the shoe depicts "before" and the right side depicts "after" treatment.
With a steady hand, I carefully repainted all of the red suede with this fabric paint. And... VOILA! Now they look just like they did when they were new!

Wednesday, January 11, 2012

God Bless GOOGLE

I recently found myself with an unexpected repair to make. One evening while we were enjoying a warm fire, my husband's unexpected strength <sarcasm inserted here> snapped the pull chain that operates the fire screen in our fireplace's door assembly. Ours is the kind that has a chain that is a counterweighted pulley system with the chain's ends coming out of the right side of the assembly frame.
I removed the assembly from the fireplace in order to better see the backside of it to ascertain if it was something I could easily fix. ...Hmm, I think I can do this!
I checked out the local hardware stores looking for a chain that might work. NOTTA. Then I tried going to a fireplace specialty store. After checking with his distributor (and telling me he was my last hope to get some of this chain), he told me he could get me some for $30 including shipping... WHAT??!? Thirty dollars for nine feet of small chain?! Are you kidding me?! There had to be another way. And there was—GOOGLE!

I discovered that the chain I needed is called "miniature sash chain" or "miniature safety chain" and I was able to find an online seller of the stuff—by the foot even—thanks to GOOGLE! And it was only $.69 a foot (shipping would be another two bucks)! YAHOO! Sure beats THIRTY!
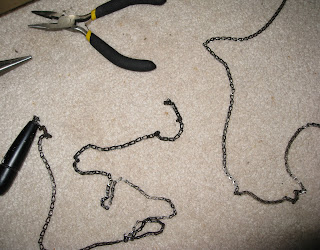
Old chain on left, new chain on right.
Here's a closeup shot of miniature safety chain.
So I threaded the chain through the assembly frame, around the pulley, and back out of the assembly.
The next step was to attach the chain to the rings on the fireplace screen.
And... VOILA! It works! (Was there really any doubt in your mind that it wouldn't?)
Friday, December 30, 2011

In the Closet

This week's episode is brought to you from the closet. I know that sounds odd, but it's true! I went to my parent's house a few days before Christmas to help my dad get a new shelf and rod system installed in the closet in their home's new bedroom so it'd be ready for Christmas guests. Here's a shot of our "canvas":
The carpet's not really that weird mustard color—just looks that way because of the fluorescent lighting in the closet.
We decided that we would build a shelved tower in the center and have additional shelves above rods flanking the tower. To make sure everything was even on each side of the tower, we decided to start our project off with the tower shelving first. Dad measured our first board, cut it in half, and cut the halves in half leaving us with four small shelves.
Here Dad is measuring the board and prepping it for cutting.
After finding the center of the shelf, Dad measured the wall to find the halfway point. We'd line up the center of our shelf with this point on the wall.

We had to pry the baseboard moulding off of the wall so that we could cut the board down so that the vertical parts of the tower would be flush against the wall.
Now the tower's done! Here's dad installing the shelves.
You can see that the baseboard moulding has been trimmed down and replaced on the wall.
And... VOILA! Here's the closet with tower, shelves, and rod (a second rod was installed on the right side of the closet later).
Plenty of storage space for a future occupant!

Wednesday, December 21, 2011

Sew Nice!**

Remember those curtains and rods I helped my dad hang a few weeks ago? Some of them were some new drapes my mom got for the family room. They look really great in the room, but now the throw pillows on the couch don't match! I hate to see the current pillows go to waste, so I decided to make new covers for them.
I decided that I wanted to make two pairs of pillows—one pair in the same fabric as the drapes and another pair in an accent color. First I had to find another drape. Since these were on super-duper-clearance, it was especially difficult to get my hands on one. As it happens, one was finally located about 200 miles from my house and I made arrangements to have it shipped to me.
I found the red fabric in a remnant bin at the fabric store. It's a nice micro-suede.
See the beige cross pattern between the circles? I repeated that pattern in my red pillows. I cut the red square into fourths, stitched it back together, and added a few more rows of stitches. 
To top them all off, I finished one of the edges of each pillow with a zipper so that inserts could be easily popped in or taken out as needed. I think they turned out pretty good! I'm looking forward to giving them to my mom for Christmas. Think she'll like them?

**UPDATE! Mom liked her pillows! Here's a shot of them with the couch!

Saturday, December 17, 2011

'Tis the Season

I'm still around! Just haven't been able to post much lately because so much of what I have been up to is Christmas gift related (check back here after Christmas for details)! However, I did finish up a project today that I can share with you.

Our family has some Christmas tree ornaments that we consider to be very special. I wanted to make some special pouches for them for during the off-season when they're in storage. First I found some red fleece (on sale, of course!)—it's that super cozy stuff that they make scarves and coats out of.
I cut from the left salvage edge to the right at a height of four inches. Then I cut my strips down into eight inch pieces. I finished the short edges with a zigzag stitch.
Here I have stitched the short edges on my eight inch pieces.
Once that was done, I folded the piece into thirds with a slight overlap of the two short edges and stitched the raw edges together.
The ornament will easily slide between both flaps with just the ribbon hanging out.
And... VOILA! Soft ornament pouches to keep our special ornaments from scratching each other!

Other projects I have been busy with:
  • Helped my kid's Girl Scout Daisy troop make ornaments for a Christmas tree at the airport and Christmas cards for their teachers
  • Assembled a firewood rack for a load of firewood we had delivered (we are REALLY enjoying our fireplace!)
  • Resized the frame for the print above the fireplace mantle
  • Sewed some Christmas presents
Another project I'm in the midst of is helping the kids in my daughter's class with some Christmas ornaments to give as gifts to their parents. The project involves painting the kid's hand and have them grasp a ball ornament. Once the paint is dry, the kids then decorate each painted finger as a snowman.
This is the inspiration image I found on the internet for the ornaments our kids are working on for their parents.
On Friday we got everybody's handprint painted on a ball. This week the kids will finish painting the faces and scarves and take the ornaments home to their folks. I'm super excited about this project—I hope the kids will be too when they see the end result! I'm especially excited that I get one!

So are you ready for Christmas at your house? We're getting there! I can't believe it's only a week away! Best wishes to you and yours...

Thursday, December 1, 2011

Blinded with Ingenuity

Today I started my day by shortening the new bamboo blind on the front door. First, I hung the blind on the door backwards so that I could visualize where I wanted the blind to hang when shortened.
The shade came at a length of 72", but I only need about 47". The white line you see here is ideally where I'd like the shade to hang to when finished.
Then I shortened up the cord to the length I wanted. 
This is part of the shade's elevation system found on the backside of the shade.
After that, I took my bottle of Elmer's glue and glued two rows. This was done to keep the strings from unraveling when the bottom of the shade is cut. Once the glue was nice and tacky, I trimmed the blind below the glue line and folded the loose strings up into the tacky glue. 

Finally, I took my hot glue gun and folded and glued the bottom of the shade about an inch, and... VOILA! A shortened shade!

Again, my faithful companion is unimpressed with my skills...

Wednesday, November 30, 2011

I DID IT!

 I GOT ALL OF MY BALUSTERS INSTALLED TODAY!!! YAHOO! :)

(Special thanks to my sweet brother in-law for loaning me his finish nailer! xoxo!)