(Special thanks to my sweet brother in-law for loaning me his finish nailer! xoxo!)
Wednesday, November 30, 2011
IT'S HERE!!
That's right! Baluster installation day has arrived! I had to take a break after installing the first one to make this post—the anxiety over starting the project and the excitement of getting one installed was driving me crazy! Now on to #4...
 |
| Baluster #2 is in! Here's #4 lined up and waiting to be marked for cutting! |
Tuesday, November 29, 2011
Back to Work!
AT LAST! I finally have time to work on my house again!
Today I started by putting another coat of paint on my front door. After it dried, I pulled the contact paper off of the glass. When we first moved in here years ago, I put contact paper on the glass to keep people outside from being able to see inside; the contact paper provides a frosted glass type of effect. I am still concerned about privacy and plan on putting up some window tint instead.
 |
| In the process of removing contact paper. Note the difference between the panes; the far left one still has contact paper on it, whereas the other three have been stripped. |
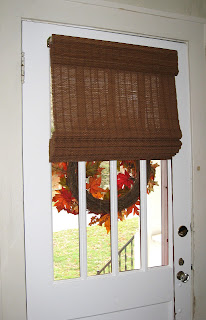
Sometimes the afternoon sun really comes beating in the front windows, so we really need a way to block out the light, especially for TV viewing. I have admired my neighbor's bamboo window treatment for quite some time and thought I'd do something similar to my door.
Once I got that done, I turned my attention to the staircase again. I started this project yesterday by removing the remaining balusters. Then I sanded the treads and underside of the railing where the old balusters had been.
I brought the balusters in from the porch. Here they are, lined up like little soldiers. Number five gives me a hard time... doesn't want to stand up very well. Soon he won't have a choice!
 |
| Here's my youngin' (aka "Big Goonie") counting the balusters, making sure everyone is accounted for. |
 |
| Remember, brown photographs weird... |
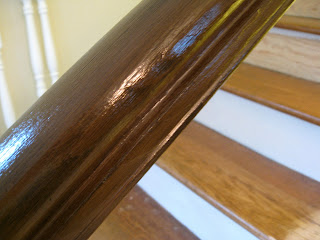
This morning I applied the same glazing technique to the railing that I did to my dresser project.
 |
| Shot without flash to try to give a better idea of what this actually looks like. Regardless, brown is still difficult to photograph. |
Once my railing paint is dry I will need to seal it with a poly-urethane coating so the glazing won't rub off with repeated touching of hands using the railing. After that I think we'll be ready to start fitting and nailing balusters! Check back soon!
Sunday, November 20, 2011
Quick! Where's My Brush?!
You know that old saying, "While the hubby's away, the wife will paint!" ...or, something like that (since he whines about the smell of the paint, I usually wait for him to leave before I bust out my brush). Well anyways, that's what happened here—he left for a few hours! :)
 |
| Applying wall color to primed wall. |
 |
| Prime, prime, prime... |
 |
| Still need to prime woodwork around the door. Maybe tomorrow... |
And lastly, I've had my eyes open for a sconce to possibly use in place of that mirror behind the door and came across this one. It is bronze with art glass. What do you think?
Thursday, November 17, 2011
Back to the Grind
I've been busy, as of late, working on some computer-related projects that have taken me away from my home improvement projects. These last two days things have slowed down enough for me to find some time to get back to the grind!
First I started with priming the wall behind the front door. I had hoped to prime the door as well, but I don't quite have all of the old paint off yet. A little more pickin' to do...
Then there's the matter of the formerly hidden sconce outlet. Do I find a sconce to put here and put this mirror elsewhere? Or do I simply plaster over it and leave the mirror here? Decisions, decisions...
 |
| You can see where the old sconce was mounted to the wall just above the mirror. |
FINALLY I was able to get some paint on the woodwork in this corner (at the bottom of the stairs)!
 |
| Primer in center of bottom square inset and on door trim. |
 |
| Primer on door and door trim; finish coat in square insets. |
 |
| Finish coat on door and surrounding woodwork. |
It looks so different looking at that side of the room tonight! Looking forward to working on that window next! It's coming along! : )
Friday, November 11, 2011
Will Help for Food*
My little one had a couple of days off from school, so we decided to leave Daddy at home and go visit my parents (2.5 hours away). As it happens, my dad is a "hack-of-all-trades" do-it-yourselfer too and has been helping my mom put the finishing touches on a new bedroom that was recently built in their house. They've been busy caulking, painting, and choosing colors, fabrics, artwork, and other decorative finishes.
Finally all that was left was the installation of window treatments, bathroom accessories (towel bars, etc.), artwork hanging, and the arrangement of furniture in the room. Dad and I decided to do this while mom was at work as a surprise! Since some of the readers of this blog will be guests in the next couple of weeks, I won't spoil the surprise of the "BIG REVEAL" but will post some snapshots of some of the projects Dad and I did!
 |
| New drapery and curtain rods |
 |
| More new drapery and curtain rods |
 |
| Cellular blind installation |
 |
| Check out that room darkening blind! So nice! |
 |
| Hand towel and bar |
 |
| Bath towels and bar |
We also got the bed assembled and all of the other furniture arranged. It was a productive visit and Mom was very pleased with what we accomplished ...AND I got to have some of mom's home cookin'! You can't beat that!
*To readers that will be visiting soon—we can't wait to show you the results of all of the hard work that has gone into this room in person! See you soon! xoxo
Saturday, November 5, 2011
On To the Next Holiday!
Slowly but surely I've been getting my Halloween decorations packed away and setting out some Thanksgiving decor. I like the decorations, but I hate getting them out because it's so tedious putting them all away and they never seem to back in their bins as nicely as they came out!
 |
| Thankfully pumpkins can be used for more than one holiday! |
I See the Secrets That You Keep
Isn't that the name of a song too? I must have 80's music on the brain... Anyways, I discovered in my incessant picking that my wallpaper is keeping SECRETS! I took down the mirror to pick at the wallpaper behind it and..
Well, looky here... Appears that once upon a time ago there was a wall sconce where my mirror currently is! Whadya know!
 |
...WHOA!! What the heck is THAT?!
|
Now I find myself contemplating if I will find a new home for the mirror and put a sconce here instead! What do you think? Is YOUR wallpaper keeping secrets??
One Thing Leads to Another
Isn't that the name of a song? Well, in this case, it is SO TRUE! Today I decided to get my rear satellite speaker to our surround system hooked back up. I disconnected it when I painted over the purple walls with the cream color.
 |
| LONG before shot of the satellite speaker located in the corner of the room behind the door. In this shot, the cord is merely nailed to the perimeter of door frame. Not attractive. |
 |
| Shot of the door area once the walls were painted cream. |
 |
| Here's a close-up of the cord cover. It has a slight opening to guide a cord into and an adhesive strip that runs the length of it. |
This is where things started to go awry. When I placed the cord cover on top of the door frame, it didn't want to lay perfectly flat due to sloppy paint and plaster repairs that had been done above the door over the years (not by me). So I decided to chip away at the crud so the cord cover would lay flat. In my vigorous chipping, parts of the wall crumbled away and old painted-over wallpaper eagerly came off of the wall. The next thing I knew, my wall looked like THIS!
 |
| So much for having just recently been painted! |
It's difficult to tell in this picture, but in this particular section, the ancient wallpaper wasn't even adhered to the wall anymore! It merely stood upright due to all of the years of paint keeping it upright!
 |
| It's so much fun picking at wallpaper when it comes off so easily! |
 |
| That black bracket next to the mirror is where the satellite speaker goes. |
Now it looks like this:
 |
| The paint around the window panes and the lower inset came off with little persuasion. |
Subscribe to:
Comments (Atom)


